Hello! says the pillow. MaisonCaro explores the possibility how interactive textiles can be integrated into a social event. She developes an interactive pillow where the virtual becomes real and soft. A pillow as a conversation starter, created during 100years Vooruit. A pillow for tomorrow with support of TIO3, using old techniques in cooperation with MIAT and knit Museum Sint-Niklaas.
The bench as a social experiment. MaisonCaro creates a long pillow as a soft chain; a series of connected items to share. A fabric lamp, a fabric speaker and a fabric audio jack are integrated in the pillow, all to share and play. A game where spectators watch players and passers-by watch spectators. Where unrelated pairs become related pairs and virtual becomes real. The pillow enables us to participate, cooperate and be part of a generative process.
- the bench at TIO3
- building up
- fixing the arduino set up
- arduino in – out
- close up arduino in – out
- fixing the wires and buttons
- repairing the buttons
- 10 buttons form 1 button
- 5 buttons go in arduino
- the lamps can be set apart from the bench, to create more flexibility
- close-up lamp
- the small pillow is a speaker with jack
- the waiting room – set up
- the waiting room – set up
- the waiting room – set up at TIO3
Hoe kan textiel ervoor zorgen dat we meer met elkaar praten, onze schroom overstijgen en onze buurman aankijken?
Caro Van den Hole is sowieso bezig met experiment, ervaringen ontwerpen, momenten maken. Om een sociaal textiel te ontwikkelen zag ze de meeste mogelijkheden in een soort kussen met lichten, lampen en geluid erbij, dat geactiveerd werd als je er op ging gaan zitten. En door de nieuwe mogelijkheden wou ze dat helemaal uitwerking in textiel. Dus schakelaars in de stof zelf, een box in de stof zelf,… Een boeiend onderzoek waarbij Caro Van den Hole aanklopte bij de Stad Gent, op zoek naar mogelijkheden. Vanuit de stad was de stap naar de Vooruit snel gezet.
Om de Talking Pillow klaar te krijgen tegen de opening van het feestprogramma 100 jaar Vooruit, heeft Caro heel wat onderzoek moeten doen om dit ogenschijnlijk eenvoudig doel te kunnen uitwerken. En veel partners moeten aanspreken. De eerste stap was een schakelaar maken in stof. Caro ging aan de slag met geleidende draden stikken en verlijmen, zocht een geschikt programma en kwam uit bij Arduino, een draad van Bekaert, een manier om een speaker te stikken,… Tio3 hielp mee bij het onderzoek en reikte nieuwe materialen en technieken aan. De geleidende draad breien bleek de beste oplossing, maar de huidige machines breien te snel voor de geschikte draad. Het SteM in Sint-Niklaas met hun collectie breimachines biedt uitkomst. Weven gebeurde dan weer in het Miat in Gent.
Het resultaat is een 7,5 meter lang kussen waar enkele draden uitsteken. Deze draden zijn de verbinding naar een lamp of een plug. In het kussen zitten 5 aparte compartimenten. In deze compartimenten zitten gestikte circuits en schuim. In het schuim zitten hier en daar gaten. Als je op die plaatsen gaat zitten, komen de twee lagen gestikte circuits met elkaar in contact en wordt er een signaal gegenereerd. Deze signalen worden dan via Arduino geregisseerd om reacties te geven in geluid of aanspringende lampen, waardoor de gebruikers reageren en er met elkaar over spreken.
Het kussen is ondertussen al 4 maanden in gebruik in het Vooruitcafé. En het werkt. Mensen gaan nietsvermoedend op de bank zitten, iemand anders zet zit en er floepen lampen aan. Het werkt de hele dag door, maar ’s avonds is de impact het grootst. Het is een echte conversation piece gebleken, zowel bij tijdens het maakproces als tijdens het gebruik.
An open manual of my process:
———————————————————–

This is a button, an on/off switch. First test with conductive thread used in a sewing machine. Good news! It works. The conductive thread was in the spool, the red thread in the needle. On another piece of fabric a small conductive fabric was glued. In between there is foam, in this foam there is a hole, only when you press, both conductive parts are connected and give a signal. We need a plan! When 2 people meet, they touch, conduct and a speaker starts to play. How to? with arduino? We tried makeymakey & raspberry pi they seem to do the trick.

Getting the right thread, Bekaert thread with 22 ohm is not too thick and not too thin or fragile. It’s great to knit, stitch or weave. I tried to knit with this thread ( grey zone ), it works best when you mix it with your normal thread. It conducts really well.
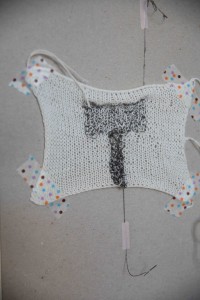
I knitted 2 pieces, hooked them up to a makeymakey.
If one person touches one piece off fabric, another touches the other piece. Both person then touch each other, you get a signal!
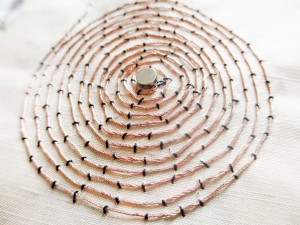
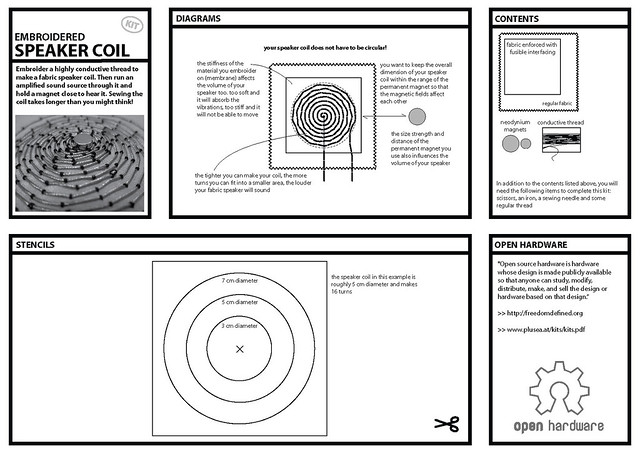
Next, we tried the embroidered speaker coil Kit. We embroider a highly conductive thread to make a fabric speaker coil. Then we ran an amplified sound source through it and hold a magnet close to hear it.
Watch how it works ! Click on this link to watch.
Can we make the spiral using the embroidery machine?
This would be the perfect spiral. This is normal thread.
Let’s try it with conductive thread. Using some oil on the joints is necessary for the smoothness of the thread.
The experiment failed! The conductive thread betinox is too fluffy and curls too much. Next week we will try with different thread.
Later that week I am doing some knitting tests at Breimuseum in Sint-Niklaas. First job: choosing the yarns..I want to create a gradient with blue & purple. The end of the visible rainbow, this as a reference to the concept where virtuality meets real life.
Together with Walter at the computer, programming the pattern.
An hour later, the sample ‘monster’ is ready!
The gradient is tested on a smaller scale and feels to fast: real model is x5 ( final size 7m50 x 43 cm). The colors will be changed for the final model.
The location: Vooruit café, the bench
Monster at the bench.
Next I did some weaving tests at MIAT. Before I tried to weave on a jacquard industrial machine at Hogent but this didn’t turn out well due to the speed of the machine; the thread continues to break. Perhaps some older machine can do the trick. I wanted to test betinox and schieldex thread on an old weaving machine at MIAT. Betonix turnes out not to work in the spool. Due to its curls, it curls up very fast and gets stuck. Schieldex works fine and is a pleasure to see the machine working after some hours of testing. The tension of the thread on the spool, the form of the spoon, the speed, everything needs to be right. In the end we even tried hand spooling to get the tension right. Some pictures;
Fabric with shieldex thread. Watch the machine in action; click here
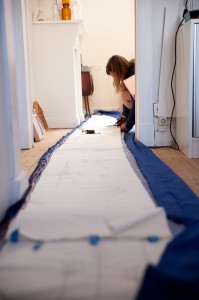
How will it work? Some planning to do… The pillow will be 7m50 cm, with some threads coming out. Some will go to a lamp, other to a speaker or jack. This is how I build it step by step :
THE LONG BUTTON PILLOW

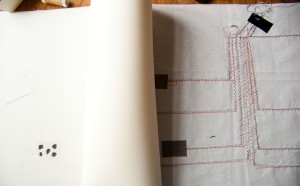
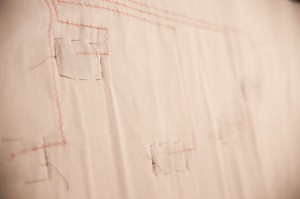
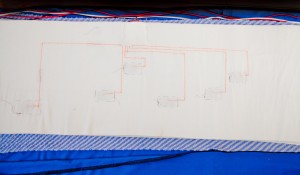
Stitching circuits on two separate pieces of cloth. To make the 7m50 workable, I made 5 smaller pillows for the inside.
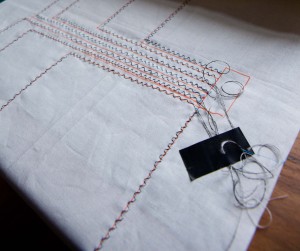
One layer of stitched circuits, foam and another layer of stitched circuits.
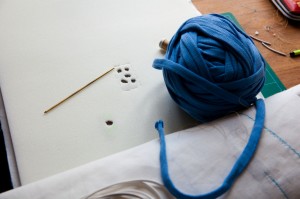
In the foam we cut some holes, if you sit the foam squeezes and both sides touch. This makes the signal and is the base of a fabric button. I found this information on kobakant, please look down for all my links.
Hard/soft connections of cable with some tape & hot glue!
Fixing the positions of the buttons. In each button pillow, 6-8 smaller buttons are made, all brought together to make 1 cable. This we did to minimize material use (expensive!) & maximize our surface.
This is what one button pillow looks like.
This is what 5 button pillows look like to make 7m50.
Finally we get to squeeze the foam in!
Fixing the lamps.
Ready to move to Vooruit !
ARDUINO SET UP
Building a sequence of reactions, programming the set up for this project. I tried to make coding visual, but didn’t work. I ended up with a long list of 27 possible combinations between 5 buttons & 4 lamps.
 Basic set-up testing with Arduino.
Dillian building the setup together with Jonas who programs the arduino.
The final set up for the project. Basically all buttons run on 5V, 5 cables come in onto the arduino, this arduino sents a signal to a relay ( tinker kit ) who converts the signal to 220V, the thread coming out of the relay is connected to the power and also to the lamp above the pillow.
THE SPEAKER PILLOWS
Embroidering the coil with copper thread.
Wrapping the copper thread with shrink tubes to avoid contact between them.
Making a little bag for the magnets.
Fixing the magnet inside and binding it into position with the button.
Plug & Listen.
TIO3, the Textile Innovation Centre Ronse, supported this project with know-how, materials and specialized techniques.
With support of the City of Ghent. Thanks to Vooruit in Ghent, SteM in Sint-Niklaas, MIAT in Ghent and TIO3 in Ronse.
This project was made possible by a cooperation between different people. I want to thank Dillian Fevry for all technical insights & implementation, Jonas Van Schoote for software build & support, Wendy Van Wynsberghe, AnnaMariaCornelia/TIO3, Marja/MIAT, Walter/Breimuseum, Kurt/Hogent, Sofie & Barbara & Joke /Vooruit and several online platforms but special thanks to Kobakant. Thank you!
My resources – links
http://www.kobakant.at/DIY/?p=4008
http://v2.nl/lab/projects/betaknit-research
– speaker
http://www.instructables.com/id/Embroidered-Fabric-Speaker/?ALLSTEPS
http://www.plusea.at/?p=4161
http://www.kobakant.at/DIY/?p=2936
– borduurwerk
– conductive bracelet
http://www.tofspeelgoed.com/accessoires.php
– science project
– raspberry pi
http://www.raspberrypi.org/phpBB3/viewtopic.php?f=26&t=4751
– grounding
http://playground.arduino.cc/Code/CapacitiveSensor
http://www.makeymakey.com/forums/index.php?topic=1267.msg2333#msg2333
– graphite
http://www.instructables.com/id/Turn-a-pencil-drawing-into-a-capacitive-sensor-for/
– forum
http://www.makeymakey.com/forums/index.php
– makyemakey instructions
http://www.tofspeelgoed.com/video.php


